Blogdown and Jupyter/Colab
in general
December 26, 2021
For my blogging purposes, I have been working so far almost exclusively with R. But since I have decided that it is time for me to deep learn❗ and therefore I have to switch to Python.
Unfortunately though, my whole blog is written with Rmarkdown and Hugo so I could not find a way to easily add Python on top. Furthermore, since deep learning is the goal, using a GPU is essentially a prerequisite so I will start out using Colab. Which begs the question how to showcase a Colab notebook using blogdown. Let’s have a look:
Step 1: Create the notebook
import pandas as pd
import numpy as np
import matplotlib.pyplot as plt
temp_df = pd.DataFrame({'x':np.array([1,5]), 'y':np.array([2,2])})
temp_df
| x | y | |
|---|---|---|
| 0 | 1 | 2 |
| 1 | 5 | 2 |
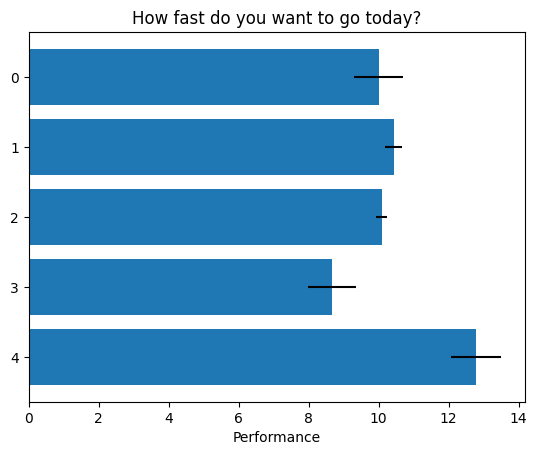
np.random.seed(32)

plt.rcdefaults()
fig, ax = plt.subplots()

# Example data
people = ('Tom', 'Dick', 'Harry', 'Slim', 'Jim')
y_pos = np.arange(len(people))
performance = 3 + 10 * np.random.rand(len(people))
error = np.random.rand(len(people))

ax.barh(y_pos, performance, xerr=error, align='center')
ax.invert_yaxis()  # labels read top-to-bottom
ax.set_xlabel('Performance')
ax.set_title('How fast do you want to go today?')

plt.show()
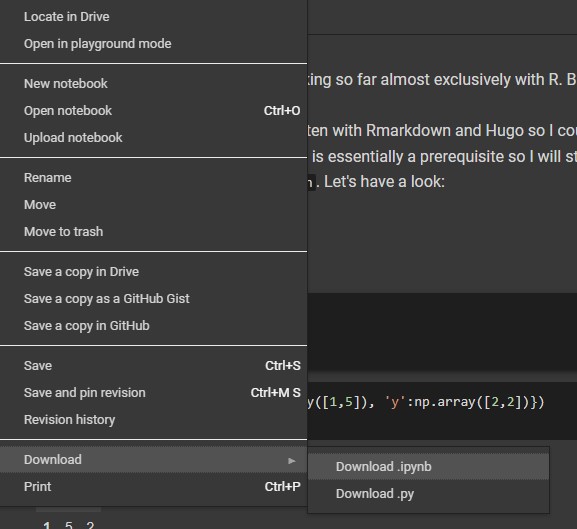
Step 2: Export the notebook as an .ipynb file
Step 3: Open the command prompt and change the directory to the place where you stored the file. Run the following command:
jupyter nbconvert --to markdown <Your_file>.ipynb
This command does the following two things:
- Converts the
.ipynbfile to a.mdMarkdown file - Creates a folder with all the plots generated from the file
Step 4: Create a new blogpost via blogdown with an .md extension and paste the content of the .md file from step 3 in the new .md file.
You can do this step in different ways as well, you could create a new folder and place the .md file there, whatever works for you.
# In Blogdown run the following
new_post('Time to merge', ext='.md')
Step 5: Store the pictures that were generated in step 3 under a folder in static
This was a bit tricky for me. Going through the
blogdown manual I think I understood why this has to be the case. .md files do not know the directory they are stored in but they can find files in the public folder which is where Hugo moves the static folder when the website is rendered.
⚠ This is my understanding of the logic so be warned that this part might be inaccurate, please let me know if I have written something incorrect here! ⚠
To have the images a bit more tidy I decided to create subfolders for each of my posts. The following html code will include the graph/chart in the post:
<img src="/python_img/2021-12-26-blogdown-and-jupyter-colab/Blogdown_and_Jupyter_Colab_4_0.png" />
Notice that there is no static in the src and that there is a dash at the beginning of the address
And that is all! I hope this has been helpful, show me your website if you managed to do something similar!
Other useful resources
Uploading Jupyter Notebook Files to Blogdown
Issues encountered so far and their solutions
- Could not turn off the interactive display in Colab. → Left only the HTML table without the format
- Could not render
.jpg→ Changed to.pnginstead